
Cold Peel, Hot Peel, Instant Peel: The DTF Mix-Up That's Wrecking Your Transfers
Oct 15, 2026
Grab your coffee, because we need to talk about the thing that trips up almost every DTF shop owner at some point: peel confusion. You get a new roll of film from a supplier, slap it on a shirt, and either rip it off too soon and watch your design curl up like a dead leaf, or you wait too long and end up with a hazy, cracked mess. Sound familiar? You're not alone. This one mix-up probably wastes more blanks and film than any other mistake in the business.
Why Peel Timing Trips Up Even Experienced Decorators
Here's the thing nobody tells you when you first start: not all DTF film peels the same way, and guessing wrong costs you real money. Let's clear up the confusion once and for all, because getting this right is the difference between a shirt that lasts through 50 washes and one that cracks by wash number three.
The Three Types of Peel (And Why They're Not the Same)
There are really three categories floating around, and shops mix them up constantly:
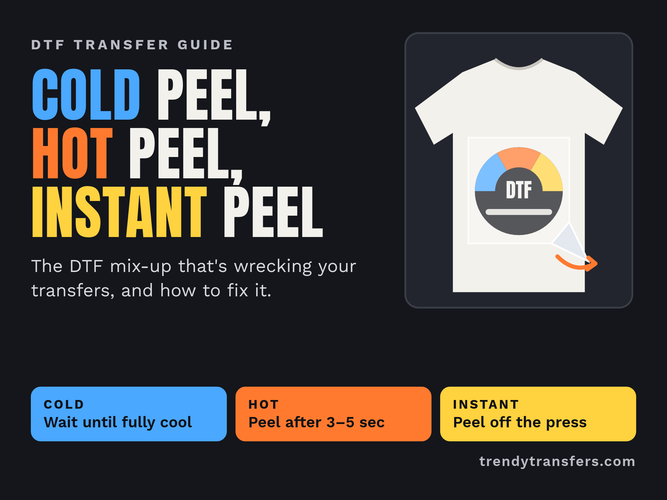
- Cold Peel: This film has to cool down completely before you touch it. We're talking room temp, or close to it. Peel it hot and you'll pull the ink right off the shirt, leaving cracked, patchy garbage behind. There's no shortcut here. None. Let it sit.
- Hot Peel: This one's a little more forgiving. You peel it while it's still warm, but "warm" doesn't mean "straight off the press." Give it a few seconds to set up first. The catch that trips people up: hot peel film can also be peeled cold if you let it rest. It's flexible that way. It's cold peel film that has zero flexibility.
- Instant Peel: True instant peel is exactly what it sounds like — off the press, off the shirt, done. No waiting around. This is not the same thing as hot peel, even though people use the terms interchangeably all the time. If your film says "instant" but you're waiting five seconds and it's still stringy, you might actually have hot peel film with a fancy label.
Mixing these up is the number one reason shops call their film supplier convinced they got a "bad batch." Nine times out of ten, it's not the film. It's the timing.
How to Figure Out What You've Got If the Roll Isn't Labeled
Buying film in bulk from a new vendor and the label's useless? Do this simple test before you run a big job:
- Press a test transfer at your normal temp and time.
- Try peeling it immediately off the press. If it comes up clean and crisp with zero resistance, you've likely got instant peel.
- If it strings or the ink looks wet and shiny, wait 3-5 seconds and try again. If it peels clean now, that's hot peel.
- If it's still a mess after a few seconds, let it sit until it's fully cool to the touch. If it peels perfectly then, you've got cold peel film. Don't rush it next time.
Write it on the roll with a Sharpie once you figure it out. Future you will thank present you.
The Real-World Fixes for Cracking, Hazing, and Lifting Edges
If you're seeing problems, it's almost always one of these three things:
1. Cracking or a Web-Like Texture
This screams "you peeled cold peel film too early." The adhesive hasn't had a chance to fully bond and set. Fix it by extending your cool-down time. In a hot shop (looking at you, garages in Texas and Florida in July), your press area might not be cooling as fast as you think. Point a small fan at your cooling station if you're constantly fighting the clock.
2. Hazy or Cloudy Finish After Peeling
Usually means you peeled too late on a film that wanted a warmer peel, or your press temp was too low to fully melt the adhesive in the first place. Bump your temp up 5-10 degrees and make sure your press platen is actually hitting the number on the display — cheap presses drift more than people realize.
3. Edges Lifting After a Few Washes
This is almost never a peel problem. It's usually pressure. Not enough pressure means the adhesive never fully bonded to the fabric fibers, especially around detailed edges. Do a second press with a Teflon sheet or parchment paper on top for 5-10 seconds after your initial peel and press cycle. This is called a "post-press" and it's a total game changer for durability.
Shop Humidity Will Mess With Your Timing Too
If your shop is in a humid climate, or you're running a swamp cooler instead of real AC in the summer, your film absorbs moisture from the air just sitting on the shelf. That moisture turns into steam the second it hits your heat press, and steam under a transfer causes bubbling and weak adhesion no matter how perfectly you time your peel. Keep your film rolls in a sealed bag or bin with some silica packs if your shop runs muggy. It sounds small but it fixes a shocking number of "random" peel failures.
What About Peeling On Alternative Items Like Hats and Canvas Bags?
Peel rules don't change just because the substrate does, but your prep does. A few quick notes if you're branching out:
- Canvas Tote Bags: Pre-press the bag for 5 seconds first to knock out moisture and wrinkles before you even lay your transfer down. Canvas holds onto humidity like a sponge.
- Hats: Use a hat attachment or a curved platen and lower your pressure slightly since the surface isn't flat. Peel timing stays the same as it would on a tee with that same film.
- Hoodies: Thicker fabric holds heat longer, so cold peel film may need extra seconds to cool compared to a thin tee. Don't rush it just because it "looks" cool to the touch on the surface.
The Bottom Line
Peel confusion isn't a sign you're bad at this. It's just one of those quiet lessons every decorator learns the hard way, usually on a rush order at the worst possible time. Label your film, test new rolls before big runs, and remember the golden rules: cold peel needs patience, hot peel needs a few seconds, and true instant peel is the only one you can rip off without a second thought. Get that straight and you'll cut your reject pile down dramatically.