
DTF Transfer Pressing Mistakes That Are Quietly Costing Your Boutique Money
Oct 15, 2026
Let's be real for a second. You didn't get into the boutique apparel game because you love troubleshooting heat press settings at 11pm. You got into it because you love good design, happy customers, and building something that's yours. But here's the thing — even the most gorgeous ready-to-press DTF transfer can turn into a cracked, peeling mess if a few small details get overlooked. Grab your coffee, because we're going to walk through exactly what's tripping up boutique owners right now, and how to fix it before your next press run.
The Peel Confusion That's Wrecking Good Transfers
This is, hands down, the number one thing that trips up new (and even experienced) shop owners. Your supplier tells you a transfer is "cold peel" or "hot peel" and somewhere along the way that info gets lost, guessed at, or ignored. Here's the truth, plain and simple:
- Cold peel means cold. Period. If you try to peel a cold peel transfer while it's warm, you will pull up ink and ruin the design. There's no shortcut here. Let it fully cool to room temperature before you touch that corner.
- Hot peel transfers need a beat. "Hot peel" doesn't mean rip it off the second the press opens. Count to 3-5 seconds, let the glue set up just slightly, then peel. Rushing this step is why people think their hot peel transfers are "defective" when really they just needed a couple more seconds.
- Instant peel is the only true zero-wait option. If your transfer is labeled true instant peel, you can pull it the moment the press lifts. But don't assume every warm-peel transfer is instant — that mix-up is the most common reason for blurry or cracked designs.
The fix? Label your transfer packs the second they arrive, or keep a sticky note on your press station reminding your team which peel type they're working with that day. It sounds simple, but it saves you real money in reprints.
Getting Your Heat Press Settings Actually Right
Every transfer supplier's formula is a little different, but here's a solid starting framework if you don't have exact specs in hand:
- Preheat the garment first. Press it empty for 3-5 seconds to knock out moisture and wrinkles. This matters more than people think — a damp shirt is a recipe for a bubbly, half-stuck design.
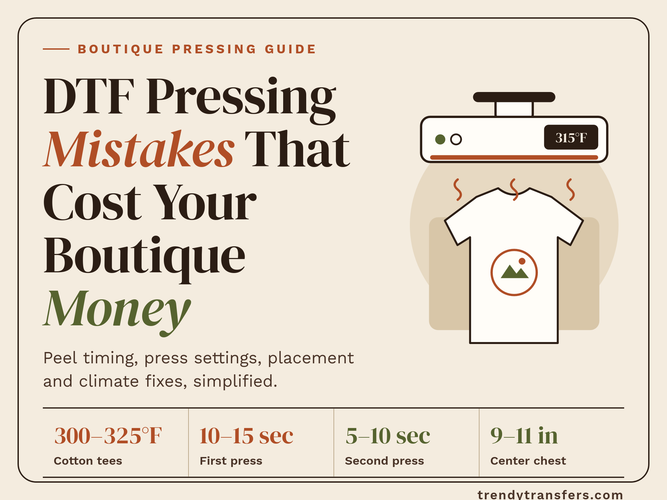
- Temperature: start around 300-325°F for most cotton and cotton-blend tees. Dial it down to 270-290°F for delicate fabrics like tri-blends or anything with spandex.
- Time: 10-15 seconds for the first press. Firm, even pressure — think "leaning into it," not just resting the press closed.
- Peel according to type (see above — this is where most mistakes happen).
- Second press (cover sheet on): 5-10 seconds. This step seals the edges and gives you that smooth, soft-hand finish customers actually notice and rave about.
Quick gut-check: if your designs are cracking after a few washes, it's almost always one of two things — not enough pressure on the first press, or skipping that second press entirely. Don't skip it. It's the difference between a shirt that looks good on day one and one that still looks good after twenty washes.
Placement Tricks That Make People Stop Scrolling
Boutique customers aren't just buying a shirt — they're buying a vibe. Placement is doing more selling than you realize.
- Center chest, slightly high — the classic for a reason, works on almost any body type when sized right (usually 9-11 inches wide for adult sizing).
- Left chest mini designs — great for a "quiet luxury" boutique feel, especially paired with a bigger back design.
- Oversized front placement — huge right now with the boxy, drop-shoulder tee trend. Think 12-14 inches wide, almost edge to edge.
- Sleeve hits — a small logo or icon on the sleeve is an easy upsell and makes a shirt feel more "designed," not just decorated.
Don't Forget Alignment Basics
- Fold the shirt in half and lightly crease the center — instant guide line, zero guesswork.
- Use heat-resistant tape to anchor the transfer before your first press if you're working with a design that has to line up with a pocket or seam.
- Measure down from the collar, not up from the hem — necklines vary, hems don't lie.
Thinking Beyond the T-Shirt
Some of the most profitable boutique lines right now aren't leaning on shirts alone. Ready-to-press transfers work beautifully on:
- Canvas totes — lower temp (around 280°F), a Teflon sheet on top, and you've got a $30+ retail item with almost no extra design work.
- Hat blanks — structured caps need a hat attachment or small press pillow to get even pressure across the curve. Keep designs small and centered.
- Neck labels — this is the boutique detail that makes people think you're a bigger brand than you are. A tiny transfer inside the collar screams "custom line," not "side hustle."
- Sleeve cuffs and pant legs — unexpected spots that photograph incredibly well for Instagram and TikTok product shots.
How Your Shop's Climate Is Working Against You
If you're running your press out of a garage in Florida, Texas, or coastal Georgia, humidity is quietly sabotaging your results more than you realize. Blanks stored in a humid space hold onto moisture, and that moisture turns into steam under your press — which shows up as bubbling or a transfer that peels unevenly no matter how perfect your settings are.
- Store blanks in a climate-controlled space, even if that just means a closet with a small dehumidifier.
- In humid regions, always preheat the garment a few extra seconds before applying the transfer.
- In dry climates (looking at you, Arizona and Colorado shops), static can cause shirts to shift on the press — a light anti-static spray or simply smoothing the garment firmly before pressing helps a lot.
What's Actually Selling This Season
Fall boutique customers are gravitating toward warm, muted color palettes — rust, olive, cream, and chocolate brown are outselling brighter tones right now. Retro serif fonts and simple line-art designs are having a real moment, especially on oversized, boxy tee cuts and heavyweight crewnecks. Customers are also responding well to "less is more" placements — a small, well-placed design on a great blank is outperforming busy, full-front graphics in a lot of boutique shops this year.
At the end of the day, great pressing is just about respecting the process — the right peel timing, the right pressure, and a little attention to the environment you're working in. Nail those basics, and your transfers will do exactly what they're supposed to do: make your apparel line look like the premium brand it actually is.